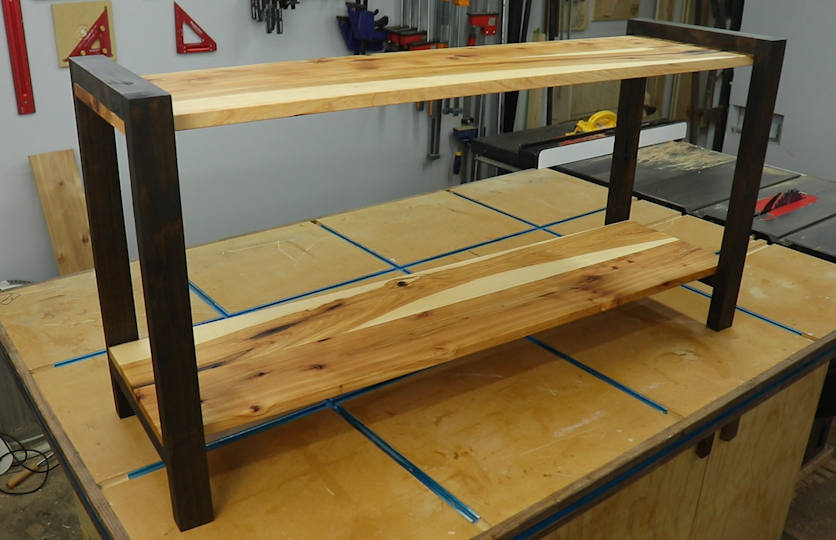
Modern Rustic Boot/Shoe Rack
We needed some serious closet organization so I built this simple yet functional boot/shoe rack. It is made from Rustic Hickory and Knotty Alder. I thought it would be cool to mix some rustic with a modern design. Let me show you how I made it!
Be sure to check out the video above for even more of a visualization.
Tools and Supplies I use in this build (Affiliate links included)
I had a couple rustic hickory boards laying around left over from another project so I decided to use them for the shelves. You could pretty much use any type of wood for this, including common 1x6's from your local home store, as long as they are kiln dried. Or you could even use 1x12's if you don't feel like doing a glue up.
I started out by measuring how long I wanted my shelves and rough cut them
a couple inches longer so I could bring them to final size later.
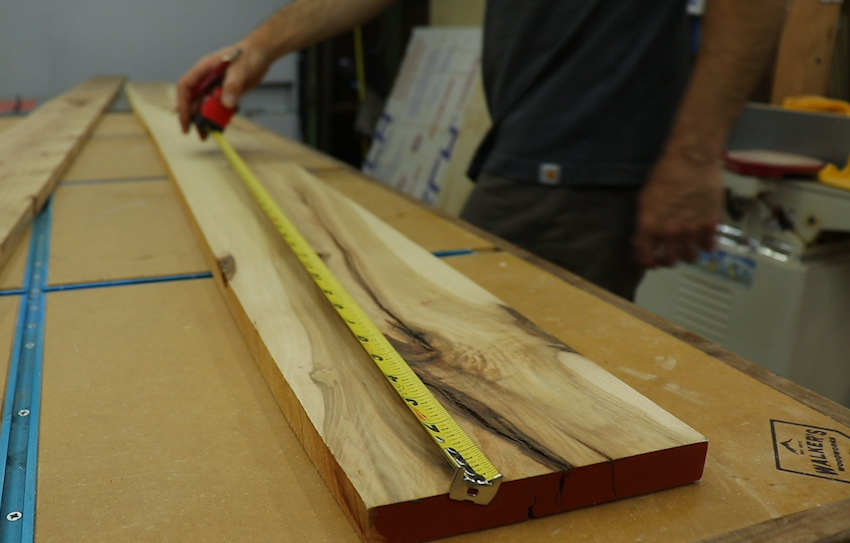
If you are using 1x6's you will need 4 of them. I chose to make my boot rack 4 feet long but you could adjust this to fit your needs.

The next step was to take the 4 boards for the shelves over to the table saw and rip them to width.
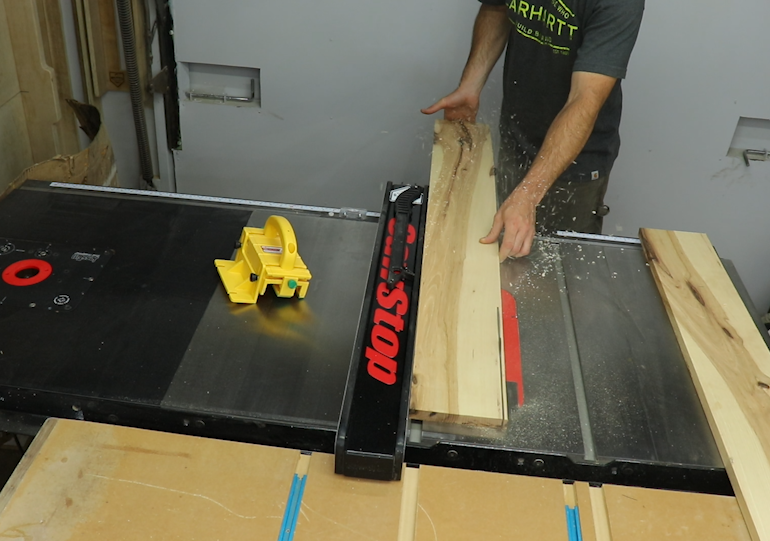
I took the boards for the shelves to the Miter saw and square up the ends but still leaving a little extra to trim off later after the glue up to bring them to final size.

The next thing I needed to address was the legs. I wanted a modern look that wouldn't take away from the shelves. I had some Alder cut offs laying around so I decided to use those up. I ripped them all down to 2" wide over at the table saw and left them at the thickness they came milled at which is an inch and a quarter.
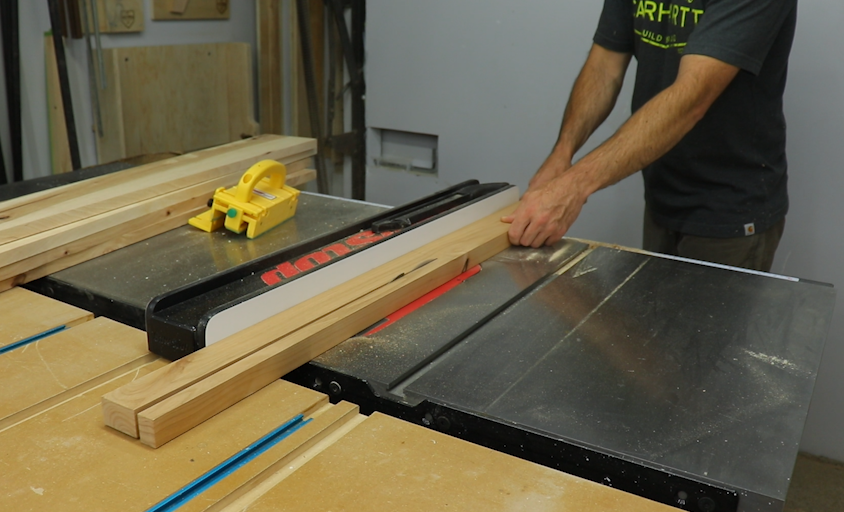
Once they were ripped to width I took them to the miter saw and trimmed them to final
size. I cut the 4 pieces that will act as the posts for the legs at 24". The cross brace pieces will depend on how wide your shelves end up at. Mine were right at 11 1/4 inches.

I decided to use pocket screws on the legs because they are fast, strong, and easy to do I drilled two pocket holes on each end of all the cross braces with my Kreg jig. That auto adjust Armor tool clamp is an add on and i admit its pretty awesome. There is a link to it in the beginning of this post if you're interested.


After all the pocket holes were drilled I could start the assembly of the legs. I used some wood glue on all the joints just to give it a little more strength. When using pocket hole joinery you want to make sure to clamp everything together before putting in the screws to prevent the pieces from moving as you assemble it.

I didn't quite have enough room for my impact driver to screw in the screws so I used this 90 degree attachment. I bought this awhile back and I use it all the time. Comes in really handy in tight spots like these.
I wanted to leave enough room for boots to be put on the bottom shelf as well as shoes
to be put underneath. So I installed the bottom cross brace so the top of it would sit 5 inches up from the bottom of the legs. When installing the bottom brace I made sure the pocket holes were facing up so the bottom shelf would cover them.

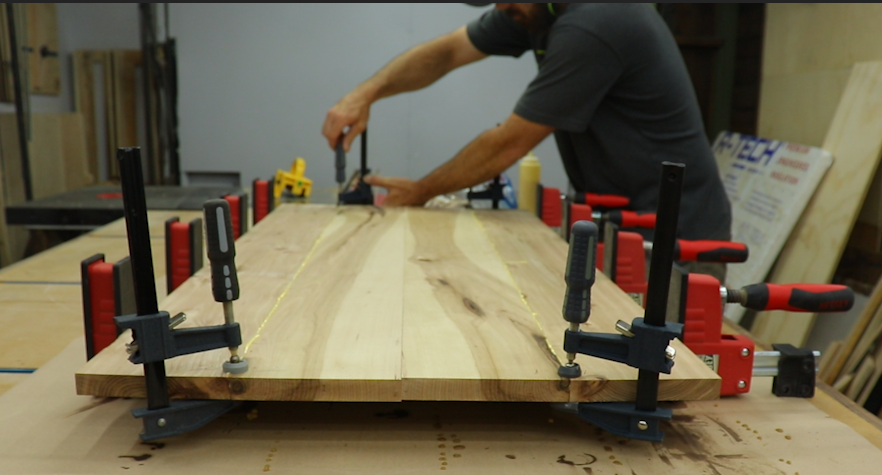
I measured and marked in from the outsides about 6" and then evenly spaced marks between them about every 8-10 inches for biscuits. If you don't know what a biscuit is, its basically a football shaped piece of wood that helps align two pieces during a glue up.


I also always make sure to label the boards so I don't get them mixed up.

Whenever I do a glue up I always put painters tape on my clamps. It helps keep them free of glue squeeze out and they stay clean.
Once I get the boards laid back out in order I stand one board up from each shelf and
apply wood glue to only that edge, making sure to get glue down in the biscuit slots. You can glue up both shelves back to back in one set of clamps like i'm doing here, just make sure not to glue them together.
Then I can insert the biscuits and spread out the glue evenly making sure to coat
the dry side of the biscuits thoroughly.

When tightening the clamps make sure your marks for your biscuits stay lined up and don’t
over tighten the clamps. Just snug them up until you see an even amount of glue squeeze out and then I typically use smaller clamps on the joint lines to ensure the boards stay aligned on the ends.
While the glue was setting up I started to finish sand the legs flushing up all the joints and breaking over any sharp edges.

I then applied a pre stain to them to prevent any blotching. Basically you just brush
it on and let it sit for about 5 minutes then go back and wipe off any excess. Let it completely dry before applying stain.


Like I said I wanted to have a good contrast so I went with ebony stain for the legs. This gives it almost a black painted look while still being able to see the wood grain.


I usually allow the glue to dry overnight although most glues set up in a few hours. I removed the shelves from the clamps and used a scraper to remove the majority of the glue.
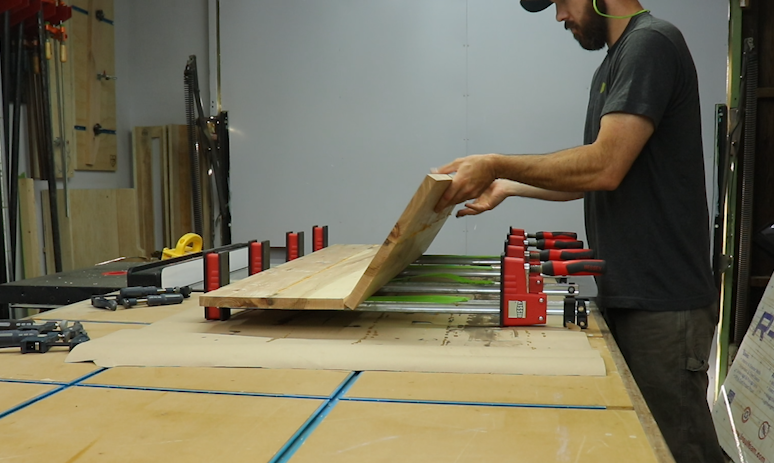

Then luckily they were small enough I could run them through my planer.


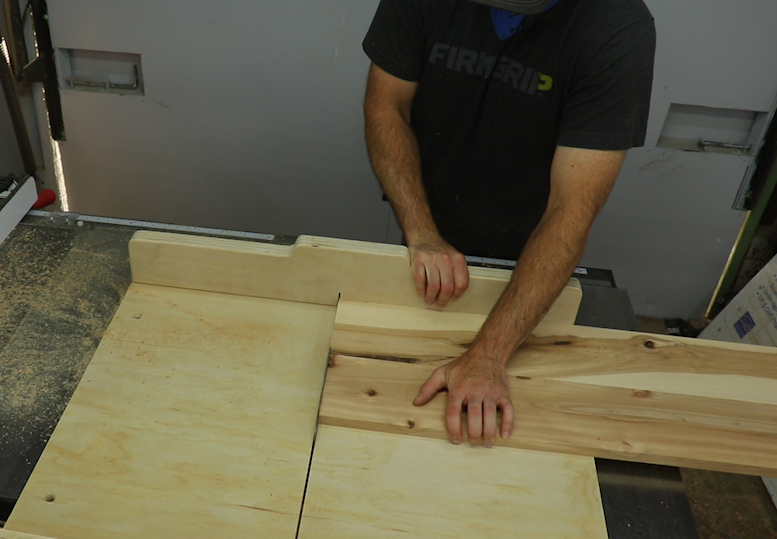
Once I got the shelves nice and flat I could bring them to the final size on my table saw.
I used my cross cut sled but you could also use your miter gauge or even a circular saw with a straight edge.

Then I moved onto sanding, I started out at 120 grit and moved my way up to 180 grit. Since i will be using an oil/wax finish on these I stopped at 180 because that's what it recommended.

I ran a mini 3/32" round over bit around all the edges. I also hand sanded all the edges just to smooth everything out.

Rubio monocoat is a oil and hard wax blend finish that molecularly bonds with the wood fibers. I really like using it because its simple and protects well without leaving a plastic looking finish. You just spread it on, wipe off the excess, let sit for a couple minutes then buff it into the wood. A little bit goes a long way.
NOTE: They don't recommend using it over stains..... I'm a rebel. what can I say. It seems to work fine.


Once everything was dry I could attach the shelves to the legs. I did this by just pre drilling, counter sinking and driving screws up from the bottom.


It got a little tricky when attaching the bottom shelf but with the help of some clamps to hold it in place I got it lined up and attached.

This was a simple and functional build that I really enjoyed and it really gave us some organization in the closet. As always thank you guys for checking out the project. Again don't forgot to watch the build video to see more in depth how I did it. Thanks! I'll see you guys on the next one.