How to Make a Planer Sled
These planer sleds are so awesome to have around the shop. If you have boards that are to wide for your jointer this is a great way to face joint them and get them flat. Let me show you how I make them!
Tools and supplies I use in this build (Affiliate links included):

First of all why do we need a sled? The reason you should use a sled is because if you just put a twisted, bowed, or cupped board through a planer it will follow the twist or bow and all you will end up with is a thinner board with the same defects. The sled allows you to adjust the board and secure it so it maintains it's position and the planer can take off the high spots until the top is flat. Then you can remove it from the sled and run it through the planer with the jointed face on the bed and BAM! Flat board.
Now let's get to it!
I had some 3/4" MDF laying around that I used for this sled. I have also made them out of plywood and melamine. I set my table saw fence to just shy of 12" and made the cut because that's the maximum width my planer will handle. I made this particular sled 32" long but you can make them as long or as short as you need. In fact I have a few different sizes I keep around for different length boards.


Once I had it ripped to width I grabbed my cross cut sled and trimmed off a piece about 2" that I will attach to the top of the sled.

Glue, clamp and screw this piece on to one of the ends. It doesn't have to be perfectly flush but I try to get it close. What this piece does is keep the board you're planning from sliding off the sled as the rollers grab it. I'll show you in a second what I mean.
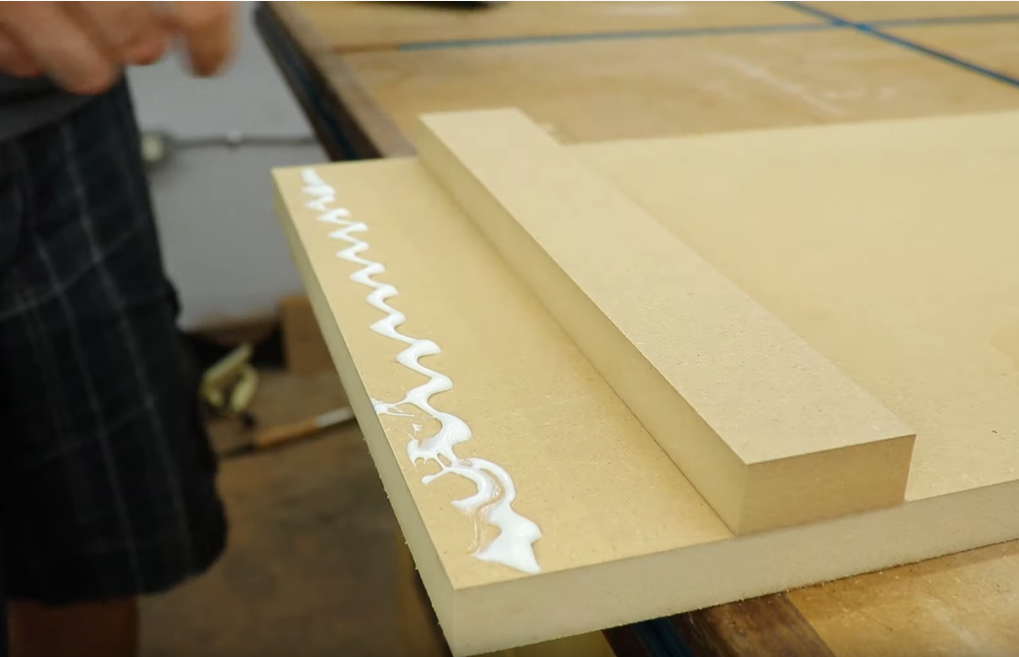

Two things to make sure of when putting in the screws. One, make sure you countersink the holes so if the planer blades do hit this piece they wont hit the screws and two make sure the screws aren't too long or they will stick out the other side and ruin your planer bed. I used inch and a quarter screws and they worked fine for this material. But make sure to check the thickness of the stock you choose.


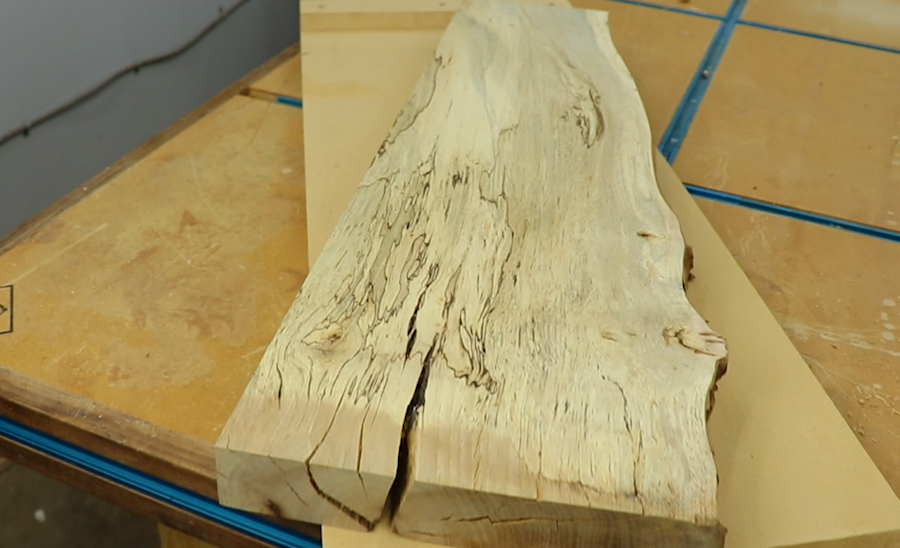
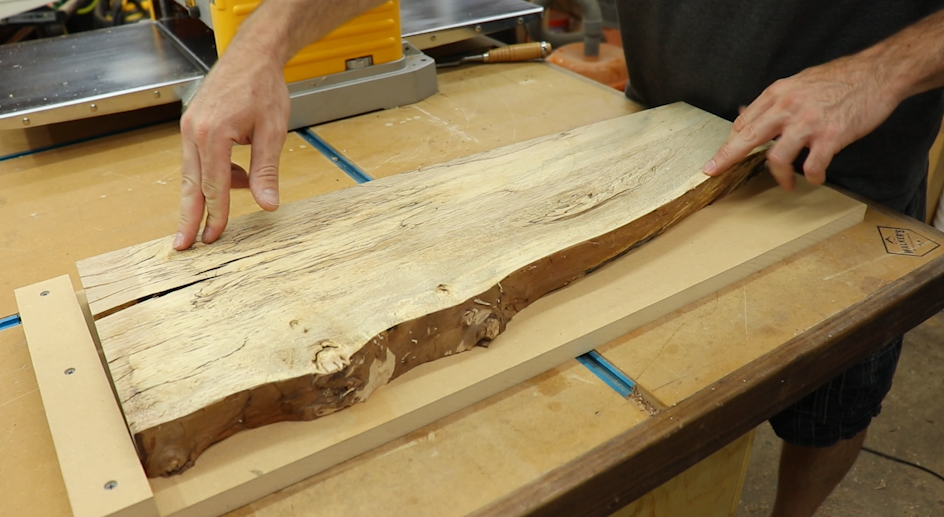
So I had this slab of awesome spalted pecan but it was pretty warped and using this sled was the perfect way to flatten it out. The first thing I had to do was make it as level as possible and I do that with wooden shims you can get at pretty much any home store. I broke off smaller pieces and wedged them under the corners that were not touching the sled.

Once I had them placed where I would minimize the most waste I used my hot glue gun to keep everything secured. Hot glue is great for this because it will hold well enough to go through the planer, but it wont ruin the sled or slab. Oh also make sure the wood is butted up against that stop block we just attached to the sled.


When feeding the sled and slab through the planer make sure you feed it with the attached stop block in front. Take light passes at first.

I did a little bit of research on which side to put the stop block and I found mixed reviews. I can tell you in my personal experience it definitely needs one on the front because I have used these without glue and a stop block... Rollers pulled the piece off the sled as it was going in and it was a bad day. I suppose ideally you would want to put a stop block on both ends and glue it down but I haven't had any problems with this method and I've used it hundreds of times.

Once you have a nice continuous cut across the whole slab you can remove it from the sled.
I use a chisel or pry bar to get it off. Remove the remaining glue, then flip it over to check for "flatness"

After that you can take your slab back to the planer and run it though with the face you just planed facing down. This will give a flat reference for the top ending up with two flat sides that are parallel with each other.

As you can see this sled works great and its a lot less expensive than a 12" Jointer. There are some fancier ones out there but I like to keep it simple.
I really appreciate you guys following the build and I really hope this helps you out in the shop! Don't forget to check out the YouTube video on this sled to get a better visual! Thanks again, I'll talk to you next time!