Toja Grid DIY Pergola Kit

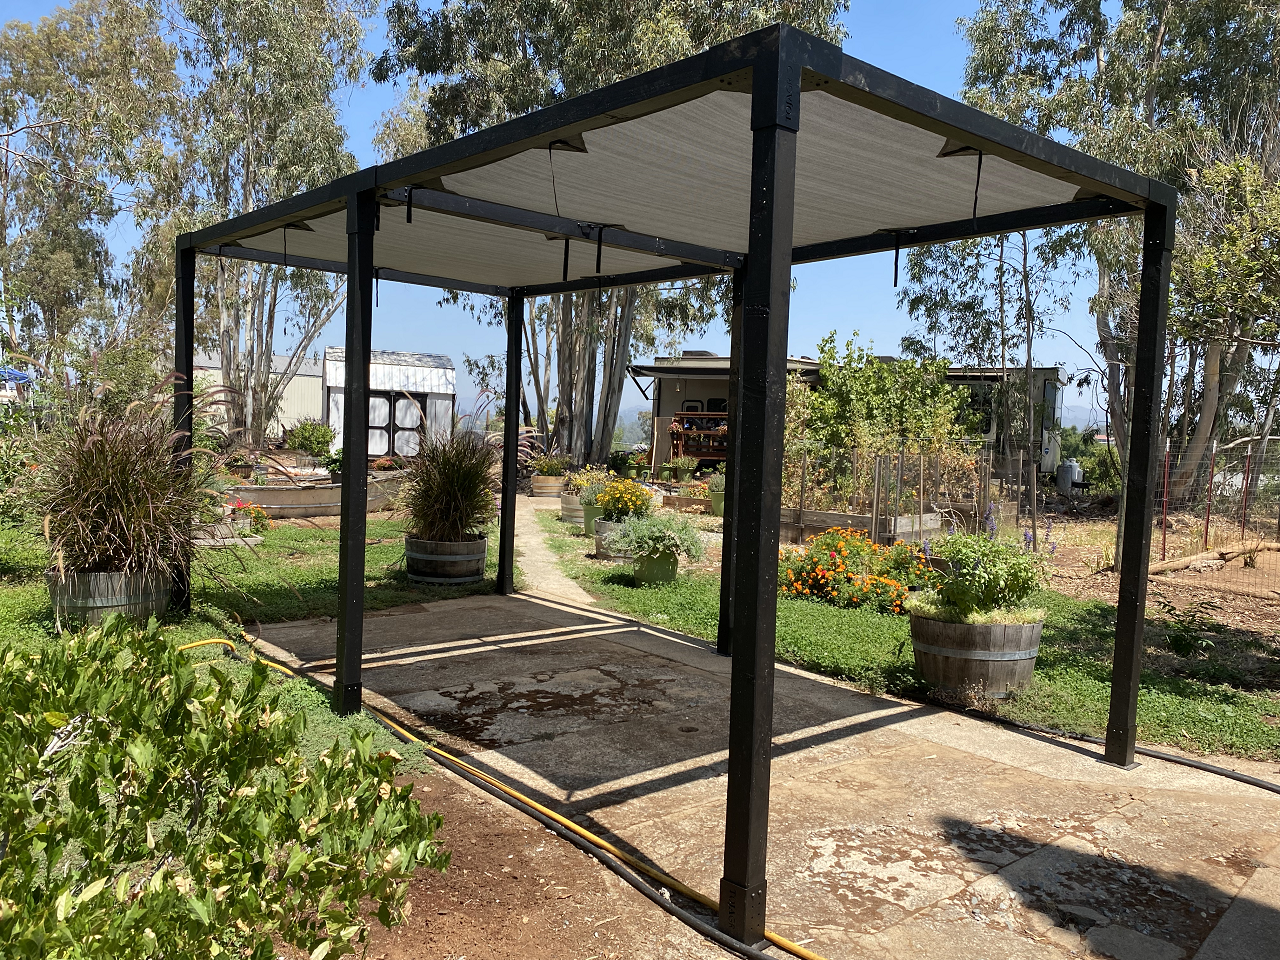
We have been wanting to transform this space for a long time. Toja Grid was nice enough to send us out a double 8x8 kit to keep the blistering hot California sun off us! Best part is, it was pretty easy to do! Check it out!
Make sure to watch the video as well!
Before we get started if you would like to pick up a pergola kit of your own you can do that here - Toja Grid
They have a style to fit any need!
First off I went to the local big box store and picked up 13 8ft 4x4 posts and some solid color black deck stain. I figured that would hold up best outdoors and give it a nice modern look that matched the house and shop I have going up. This is the first time I have used this big staining brush and I must say it worked VERY well.
Check it out here - Wooster Brush

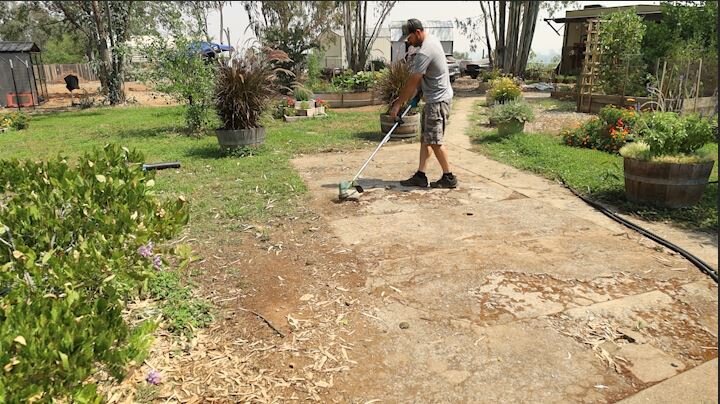
Between coats (I did two) I took some time to move the old furniture out of the way, weed eat the weeds and clean up the patio some before putting together the pergola.


Once the area was clean I unpacked all the Toja Grid brackets and hardware.


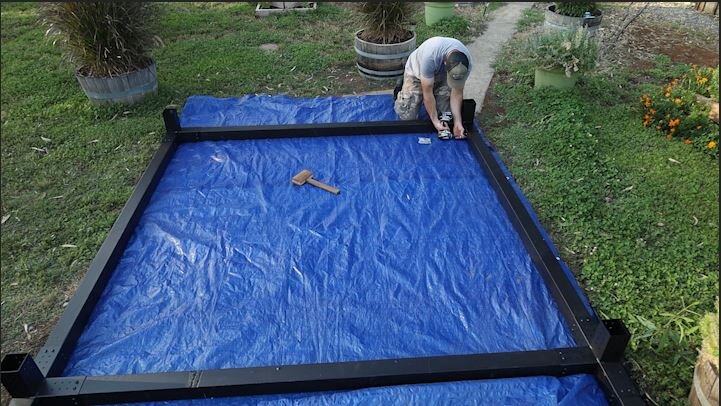
I then laid out a tarp in the work area to avoid scuffing up the brackets and posts. You start by assembling the top upside down. I laid out all the brackets needed for the top of the structure.
Side note - My tarp was not even close to big enough!

I started assembling on one corner then moved to the other. Making sure the posts were all the way inserted into the brackets and up against the tabs inside. Once inserted I secured them with 4 of the provided screws per post. Then finished them off with the provided black caps to hide the screw heads.


I repeated the same process for the rest of the brackets until the top was assembled.


Once the top was all assembled I took out the sails that will provide the much needed shade on these hot summer days. I chose a Gray colored shade but they offer many color choices.

All that’s needed to connect the shade to the frame is some provided brackets that you screw into your frame. Then the shades themselves loop around and clip to themselves. Also they are adjustable so you can get them centered and pulled tight.


Then it was time to call in reinforcements! This part requires 3-4 people. So I convinced my Mom and Girlfriend to help me get it flipped over.
(Yes that’s a Catio in the background haha)

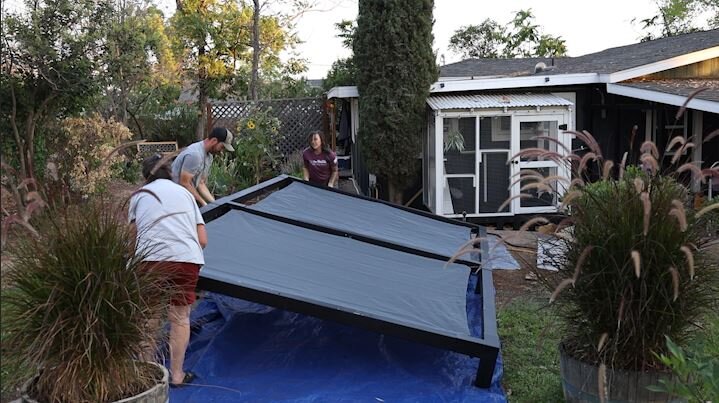
Once we got it flipped over I attached all the base brackets to the legs.


This part was a little sketchy not going to lie. I would recommend 4 people for this part and an actual ladder but we got it done haha. Starting with one side, I lifted it up and the girls put in the legs then it rested on them while I secured them with screws and caps.

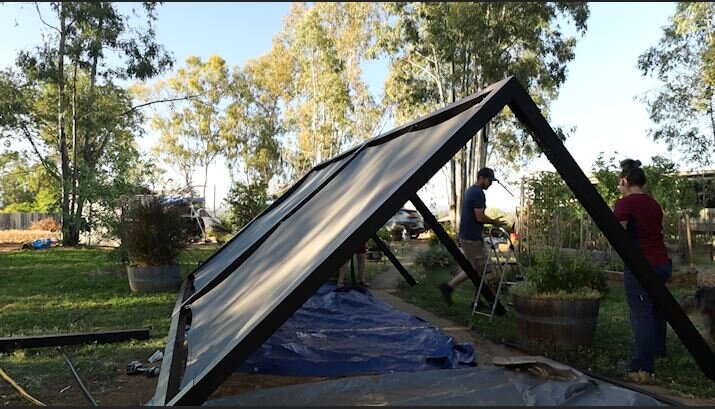


That side actually wasn’t to bad. But when it was time to lift the other side… That’s where it got real heavy all of a sudden. HAHA. Like I said, we got it done. Basically The same process was repeated on the second side.


The dogs wanted to help…

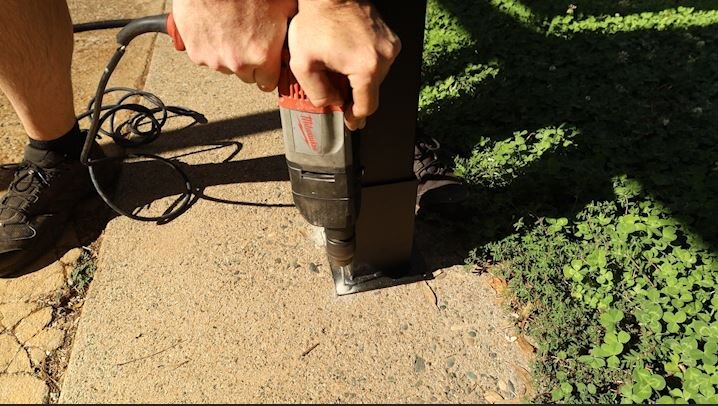
Once we had it assembled we carefully scooted it over to where its final resting space would be. I grabbed a level to check each post to make sure they were straight. Then I anchored it down to the cement using concrete anchors and big tent stakes in the dirt. It’s not going anywhere! - Every grown man ever.


It’s just that easy! Now we have an awesome spot to put some outdoor furniture and enjoy some meals outdoors without cooking ourselves in the sun. So happy with how this came out. Again if you guys are interested in doing one of these yourself check out Toja Grid They have all kinds of options. Even hammocks! Which is probably going to be our next setup! Appreciate you checking out this article and supporting me doing what I love. Don’t forget to watch the video :) hope you all have a great day!