
Making and Using Upgraded Router Sled Rails!
Hello again! I decided to make some better rails for my router sled and figured i'd show you guys how I did it.
Check out the video above for an even better description of the build!
I was just using 2x4's for rails before that I screwed down to my workbench, but since I built a new bench I didn't want to do that. I wanted to create some new rails that I could clamp down. I took some 3/4 inch ply that was left over from another project and cut it to the length of my assembly table, which is 6 ft.

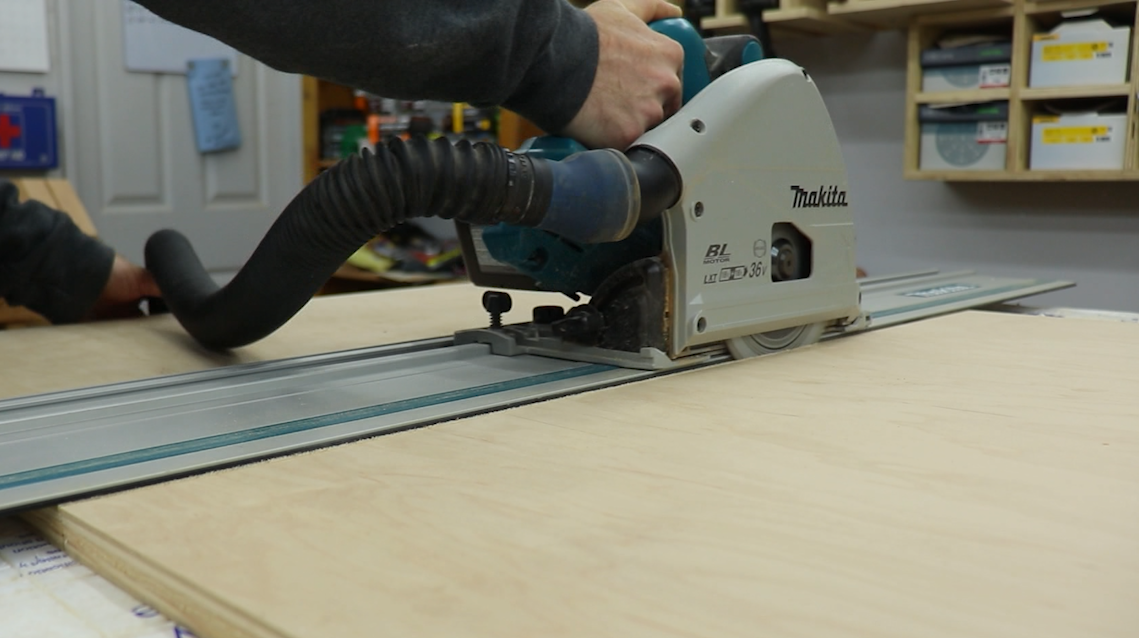
Then I set up my stock guides for 3/4" material and cut four, three and a half inch strips
out of the 6 ft long sheet, as well as two 2" strips.

Once I had all my pieces cut I laid them out to get an idea of what the rails would look like.


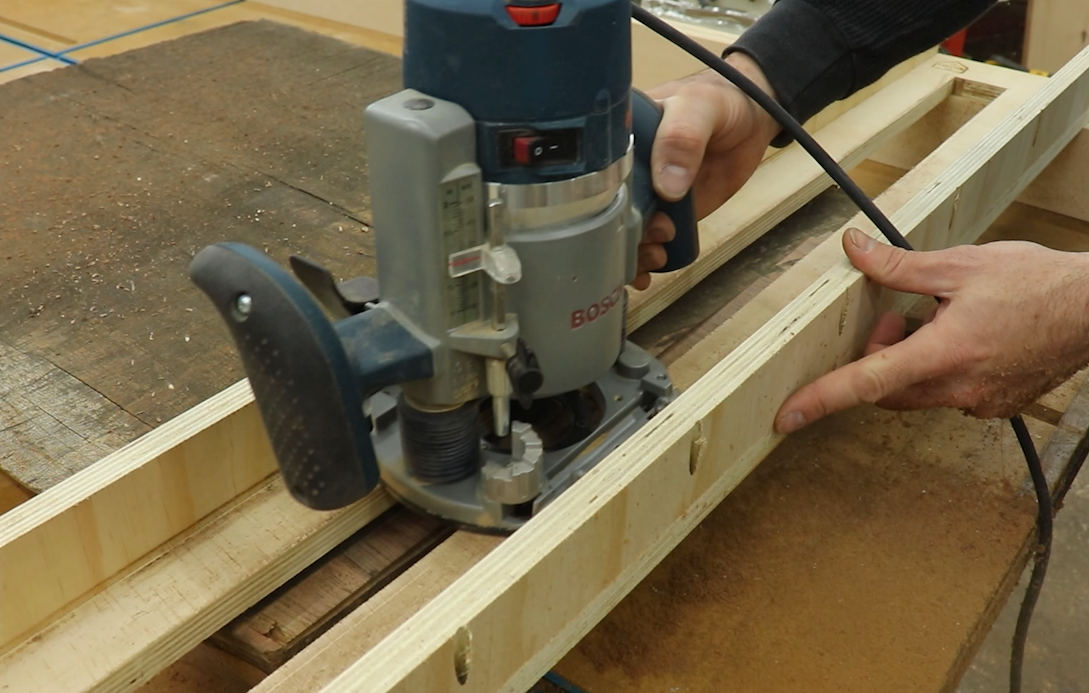
I laminated two of the 3 1/2" strips together using Titebond Quick and Thick. I like using this stuff on shop projects because it dries pretty fast. Using clamps to make sure everything was lined up I drove in some 1-3/4" screws to secure everything.


As for the two inch strips, I drilled some pocket holes in them and attached them to the rails for a clamping surface. If you use button head screws like I did make sure the screw heads on the main rails are facing the inside when you attach these pieces so the sled wont hit them. If you are smarter than me you will use countersunk screws so it won't matter.


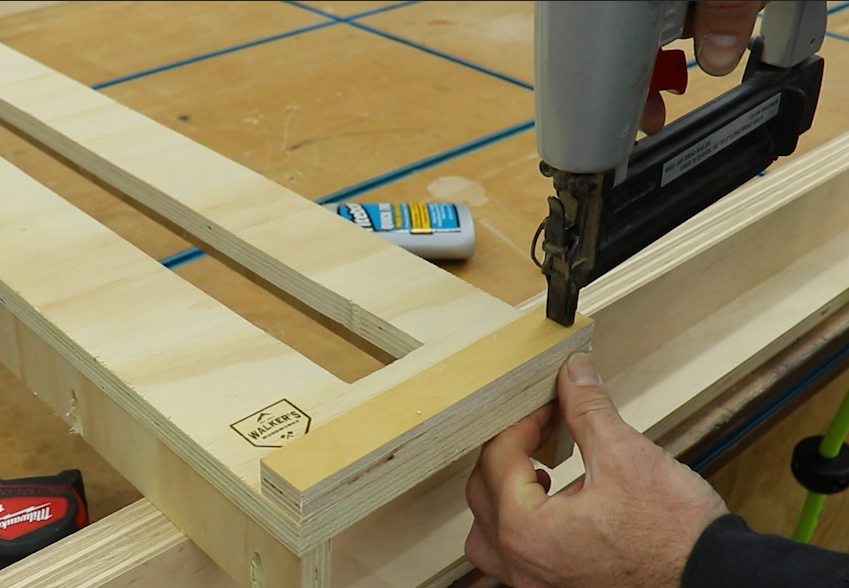
I used to have problems keeping the sled straight while sliding across the rails. So I cut and attached some 1" wide strips of 3/4" ply to keep the sled on track. I just used glue and brad nails for this.
The last step is to add some paste wax. I always use this stuff on my jigs and sleds, it makes everything slide nice and smooth.


In the last pic you get a better idea of how it clamps to the bench.

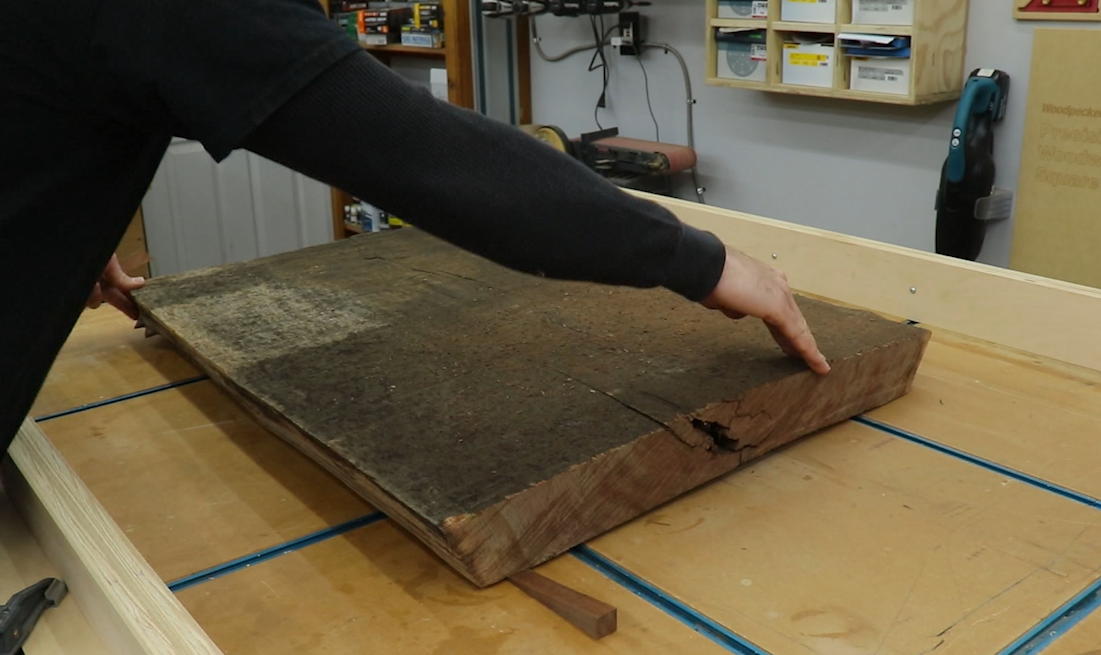
This walnut slab was really cupped on one end so I decided to cut it down to salvage as much of the thickness as possible. If I had flattened the whole thing it would have probably ended up about an inch thick.

Once it was cut I could lay it on the bench and use shims to get it fairly level. This piece was heavy enough that it wouldn't move but if you have a lighter slab you would need to secure it to the table. Hot glue works pretty well.

I've teamed up with Bits & Bits this year and they sent me this 2" surfacing bit. It's a beast and I wanted to put it to the test on this old claro walnut slab. It has their Astra Coating on it so it will stay sharper 2-3 times longer. If you guys are interested in this bit or anything else offered by Bits & Bits Company website https://bitsbits.com/ you can use the code: WALKER15 to get 15% off. :)

When you first start out you're just going to be taking off the high spots. Don't try to take off to much at once. I usually shoot for about 1/8" max. It's time consuming but worth it in the end. Also when taking passes try not to overlap the last one by more than half.

Once you have made several passes you will see it come to life! The lines in the slab are normal and can easily be sanded out.

You can also use this method to flatten normal boards that are to big for your planer or even cutting boards. It's a great asset to any wood shop.

It definitely makes a mess but just look at those colors!


All in all the rails worked great and that bit is awesome! Happy with the overall new set up!
Thanks for reading!
- Brandon
