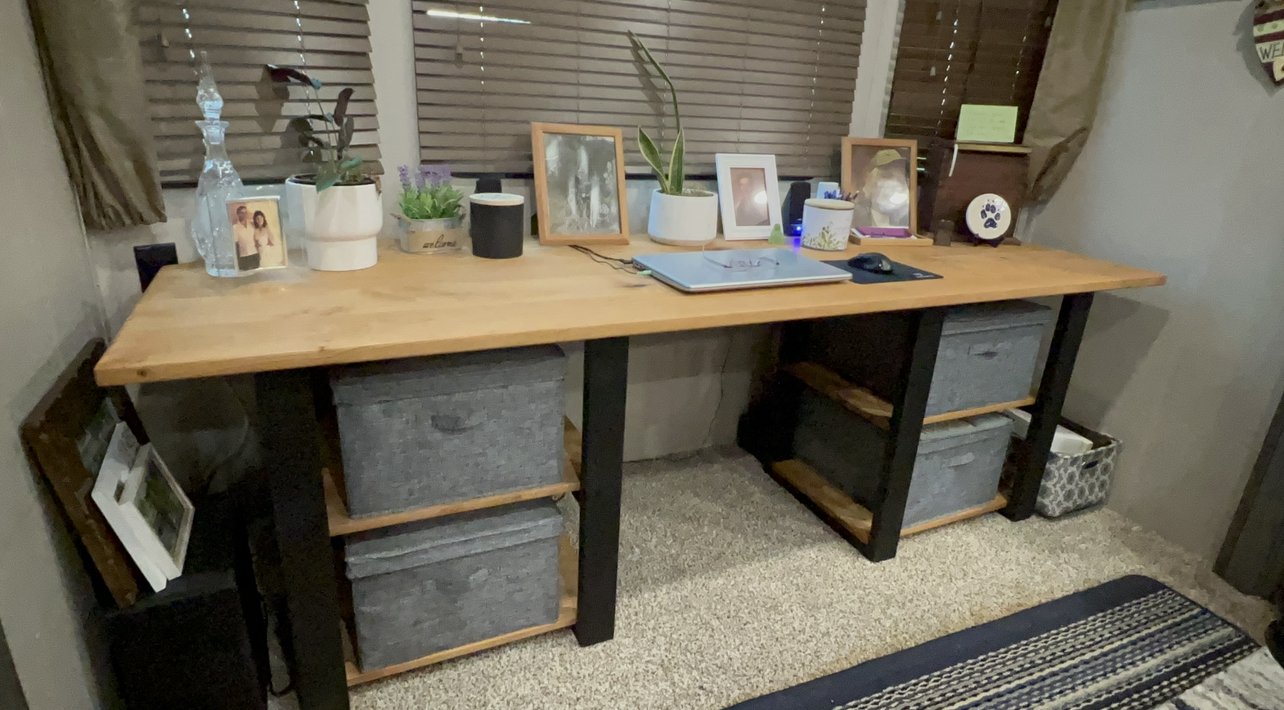
A Desk For Mom
Well… I procrastinated o n this one long enough! My mom lost her house in one of the horrible California wildfires in 2020. We moved her onto our property and she bought a big park model RV to live in. Any of you that have stayed in an RV for any length of time know the amenities and furniture quality in them is pretty sub par. I decided she needed a nice desk to sit at because she spends a fair amount of time at the computer. This is what I came up with…
Special thanks to Home Depot for inviting me to be part of the PRO-Spective program and for sponsoring this build!
Tools provided for this build…
ONE+ HP 18V Brushless Cordless 6-1/2 in. Track Saw Kit - https://homedepot.sjv.io/c/3106512/1468013/8154
ONE+ HP 18V Brushless 110 MPH 350 CFM Cordless Variable-Speed Jet Fan Leaf Blower - https://homedepot.sjv.io/c/3106512/1468012/8154
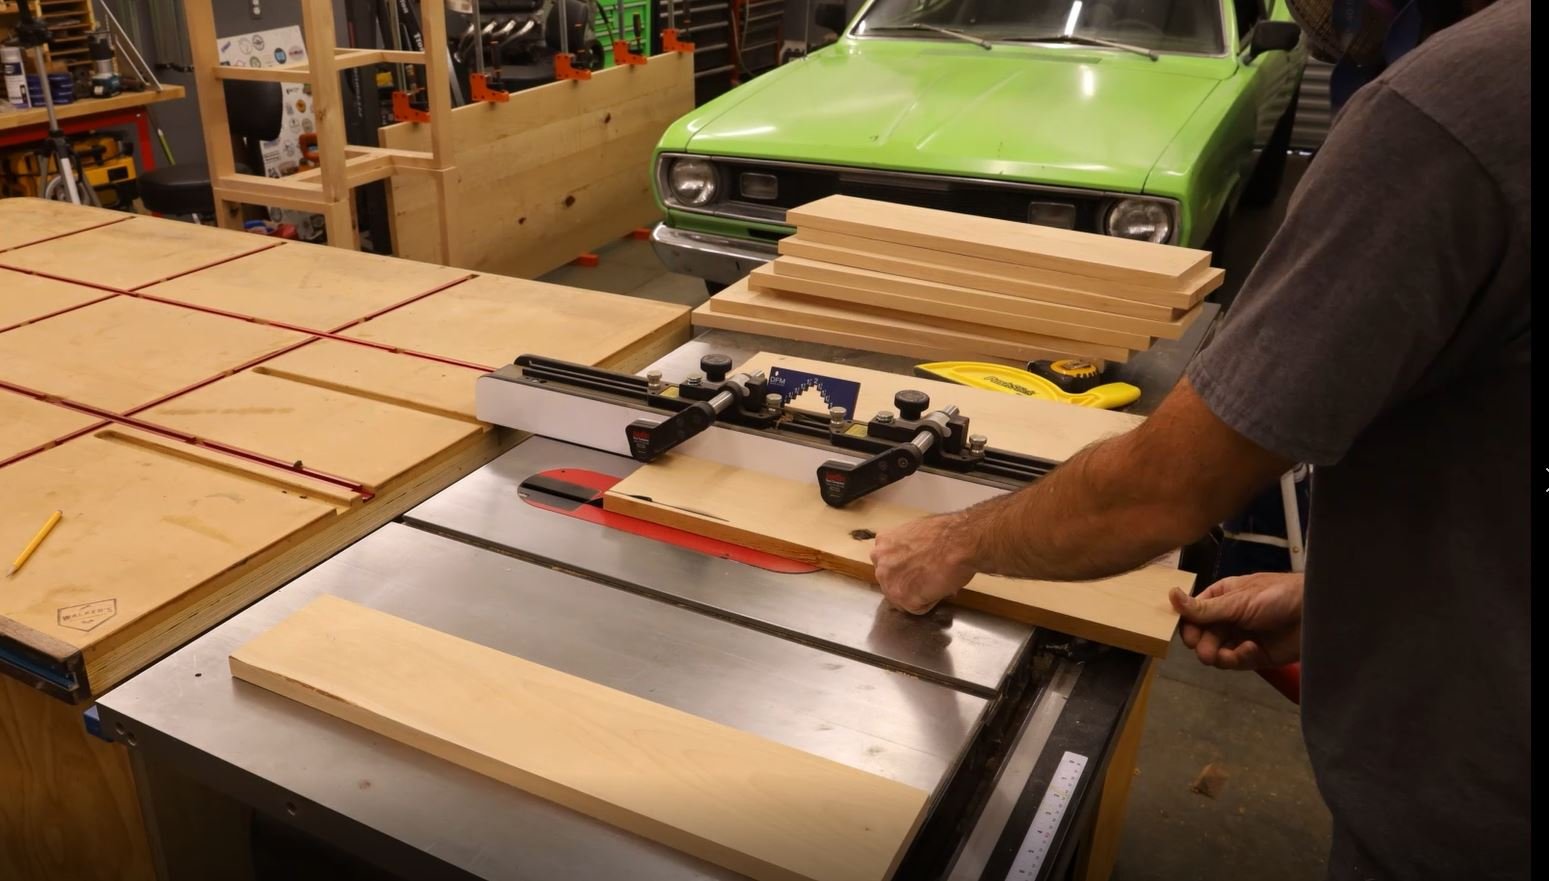
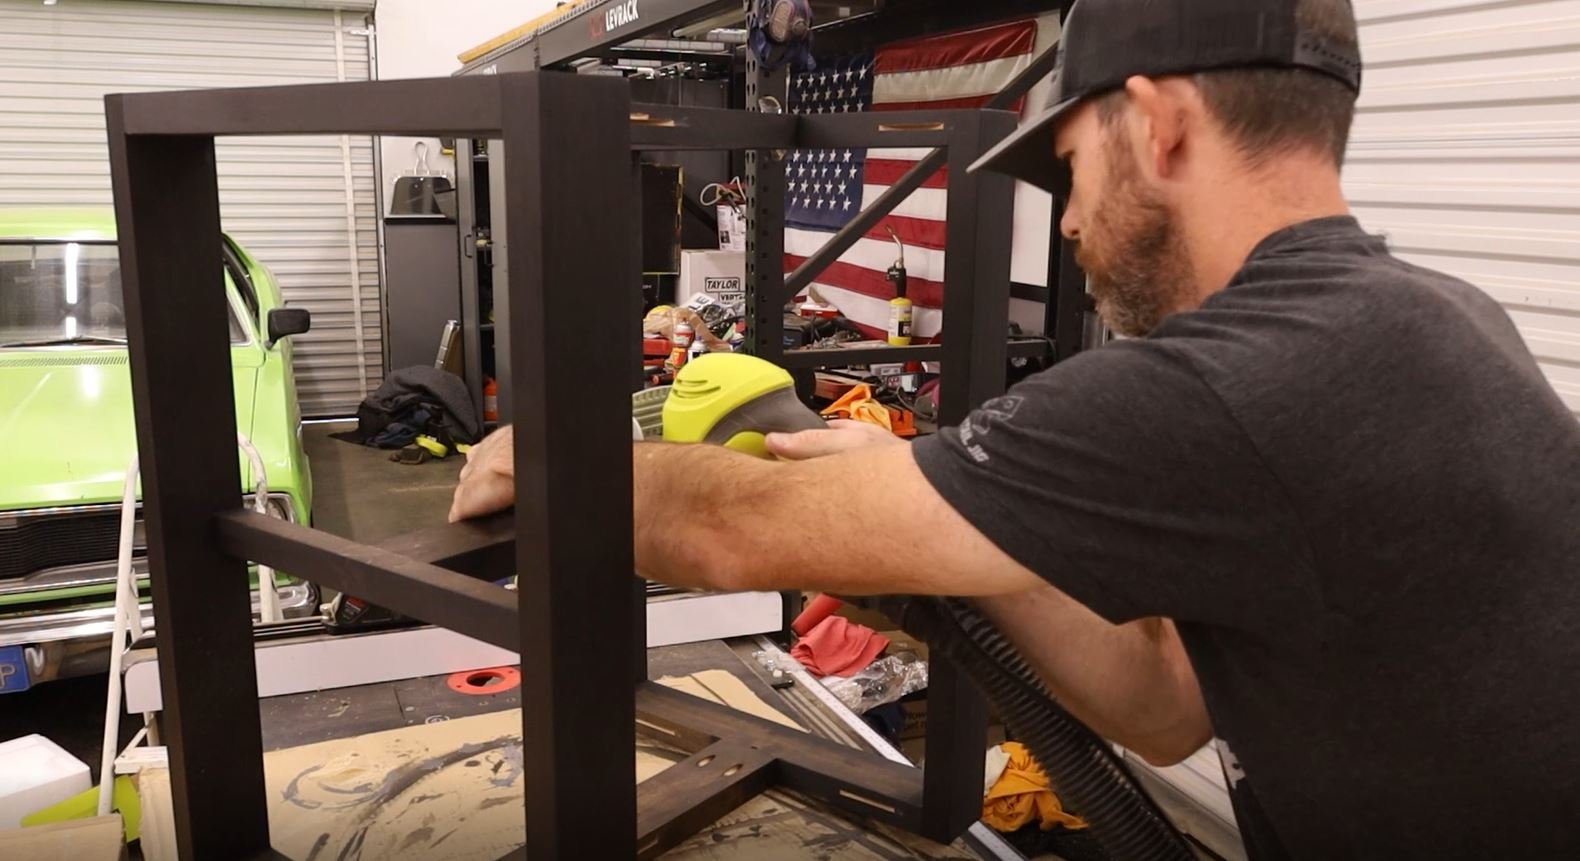
I started off by getting the lumber down for the top that I previously bought and let get acclimated to the shop. Then I cut it down to rough length and width. I tried to keep the shop somewhat clean while working with the Ryobi ONE+ HP 18V Brushless blower. That thing works great!


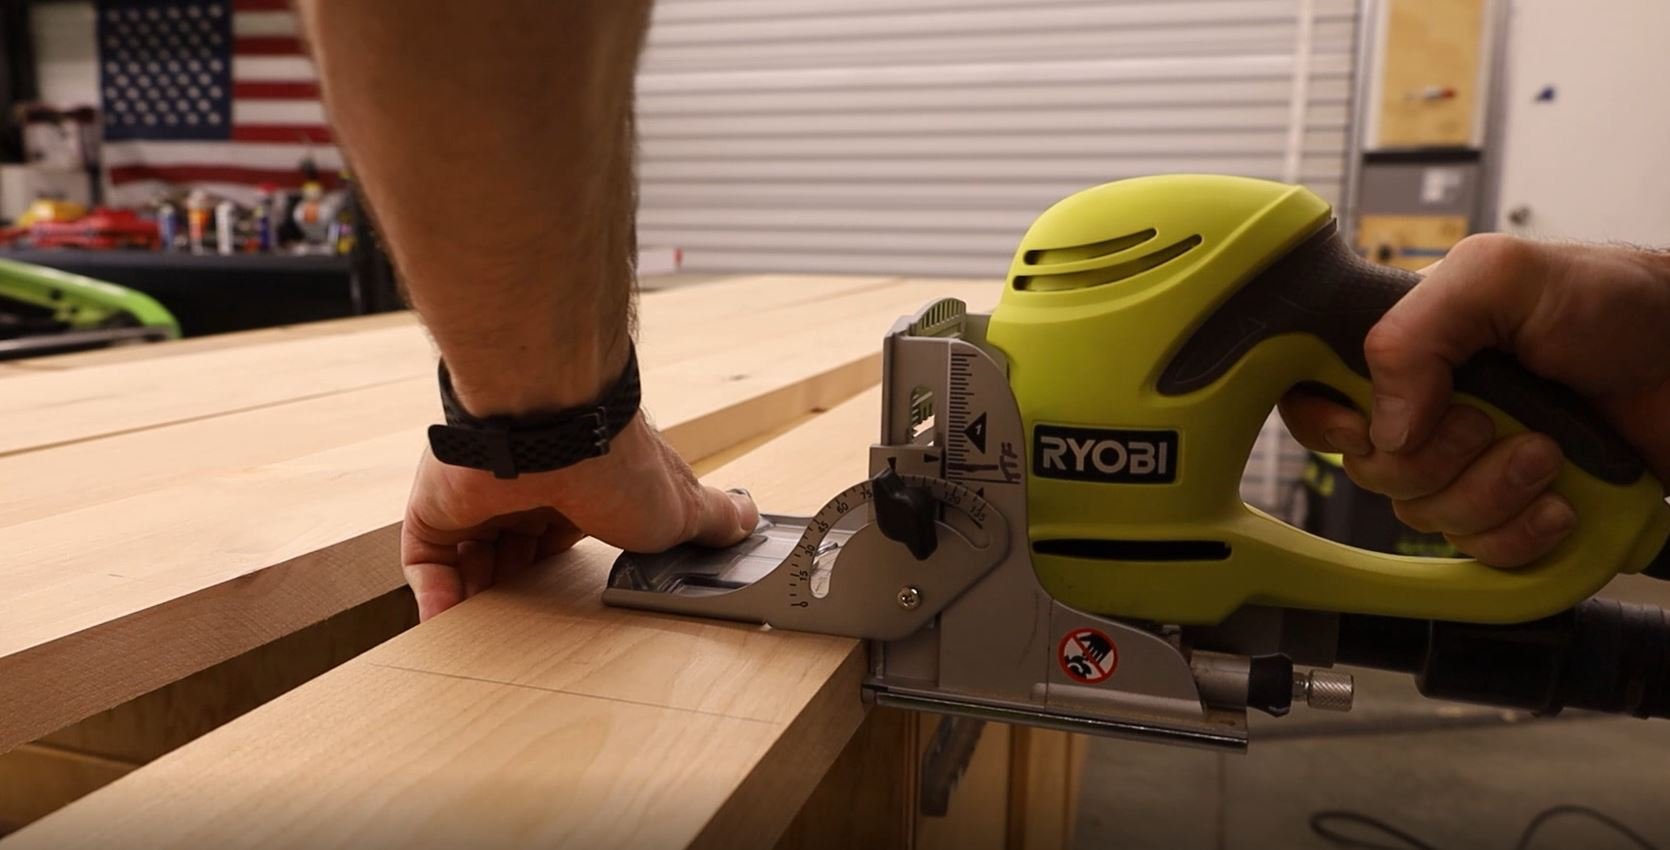
Once I had all the boards cut to size I laid them out and labeled them in the orientation I liked. Then I used my biscuit jointer to cut spots for the biscuits to go. These help keep all the boards aligned during glue up.

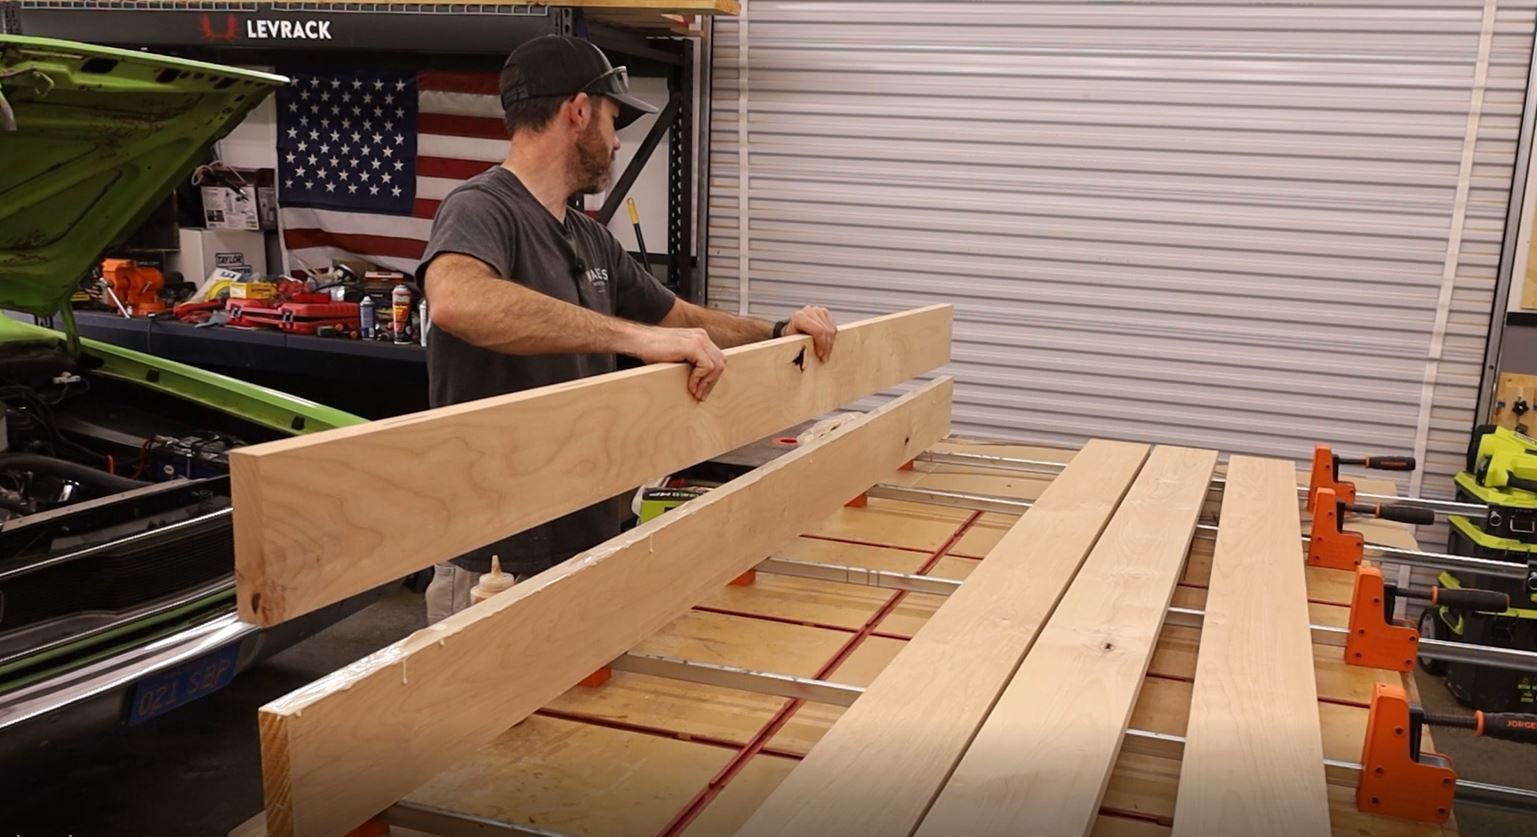
At that point the boards for the top were ready for glue up. I was sure to use plenty of clamps to make sure it stayed flat.

After the top had cured I filled all the knot holes and cracks with epoxy. This ensures the to is nice and smooth. Plus nothing can get down in the knot holes and cracks.

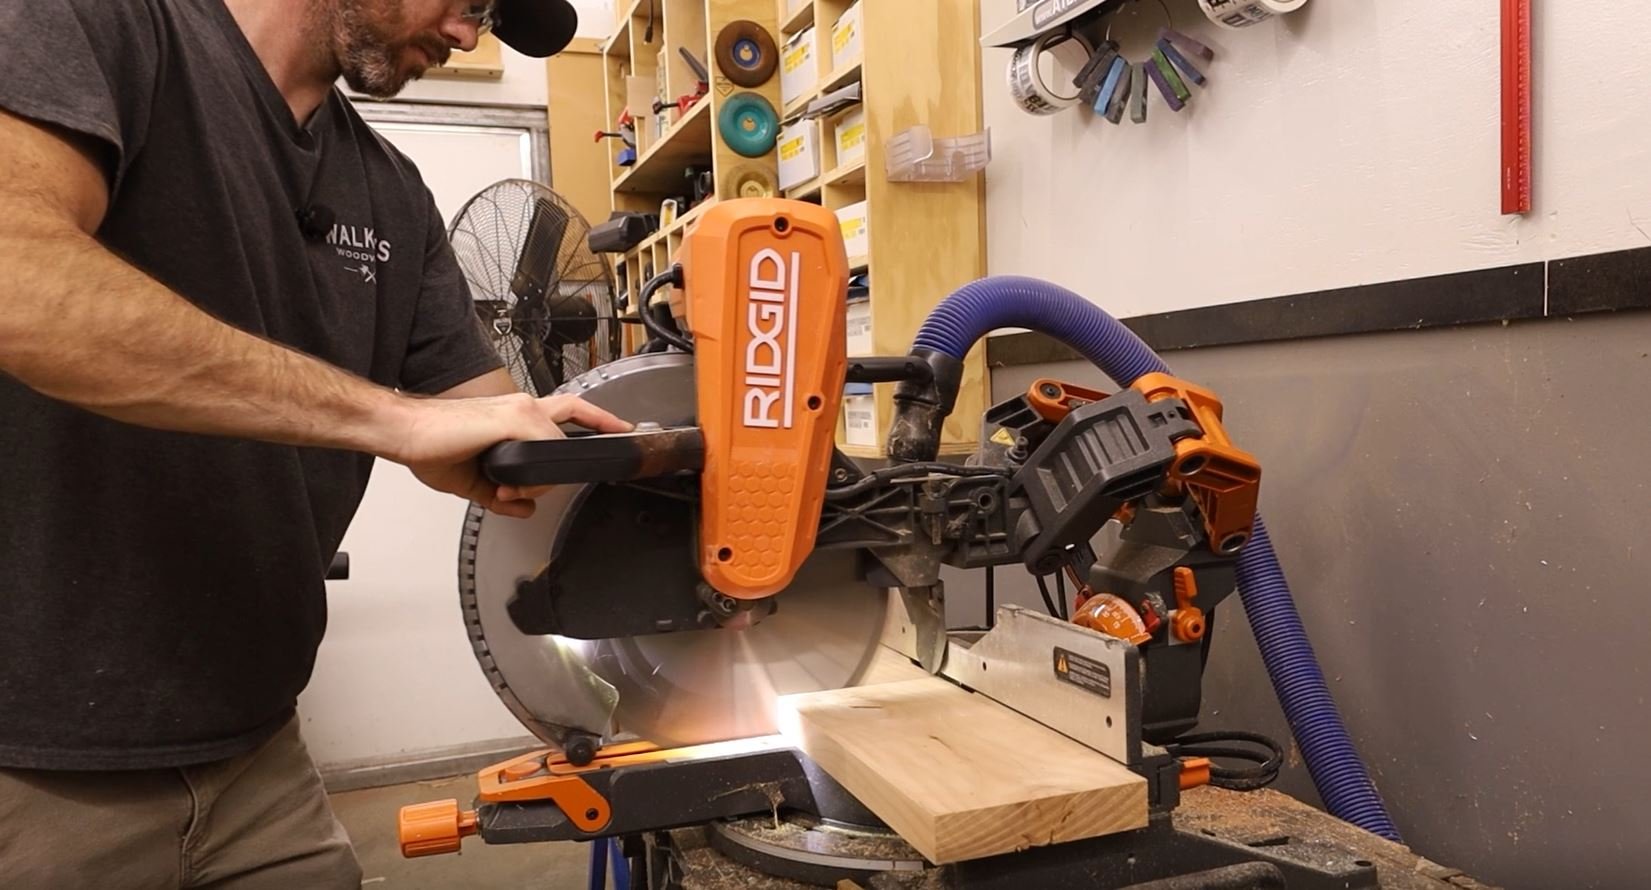
I then moved onto cutting the boards for the bases. First to width at the table saw then over to the miter saw for length.


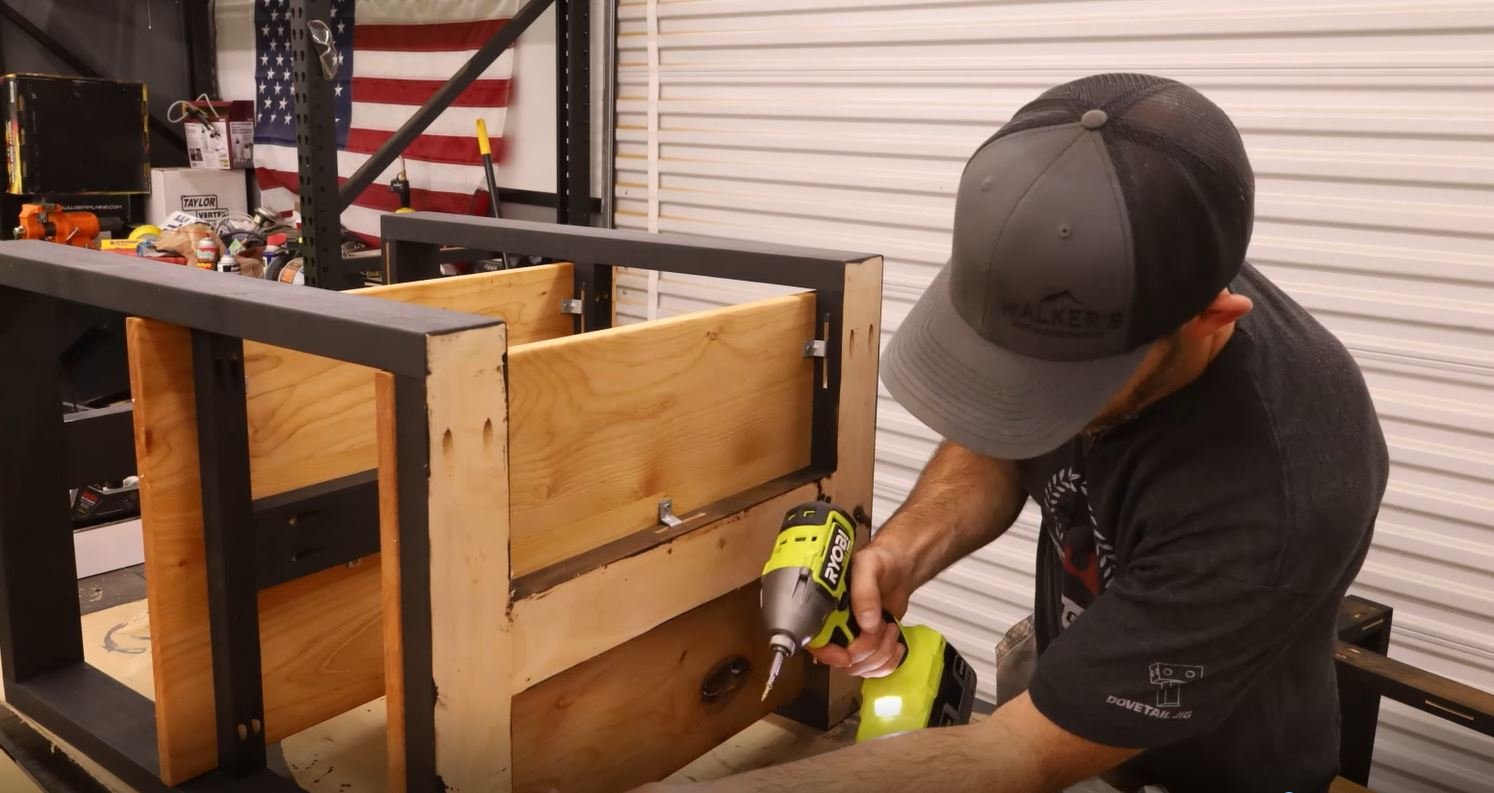
I decided to use pocket screws for the joinery on the bases. They work great for this type of assembly. I got all the pocket holes drilled and the bases assembled.


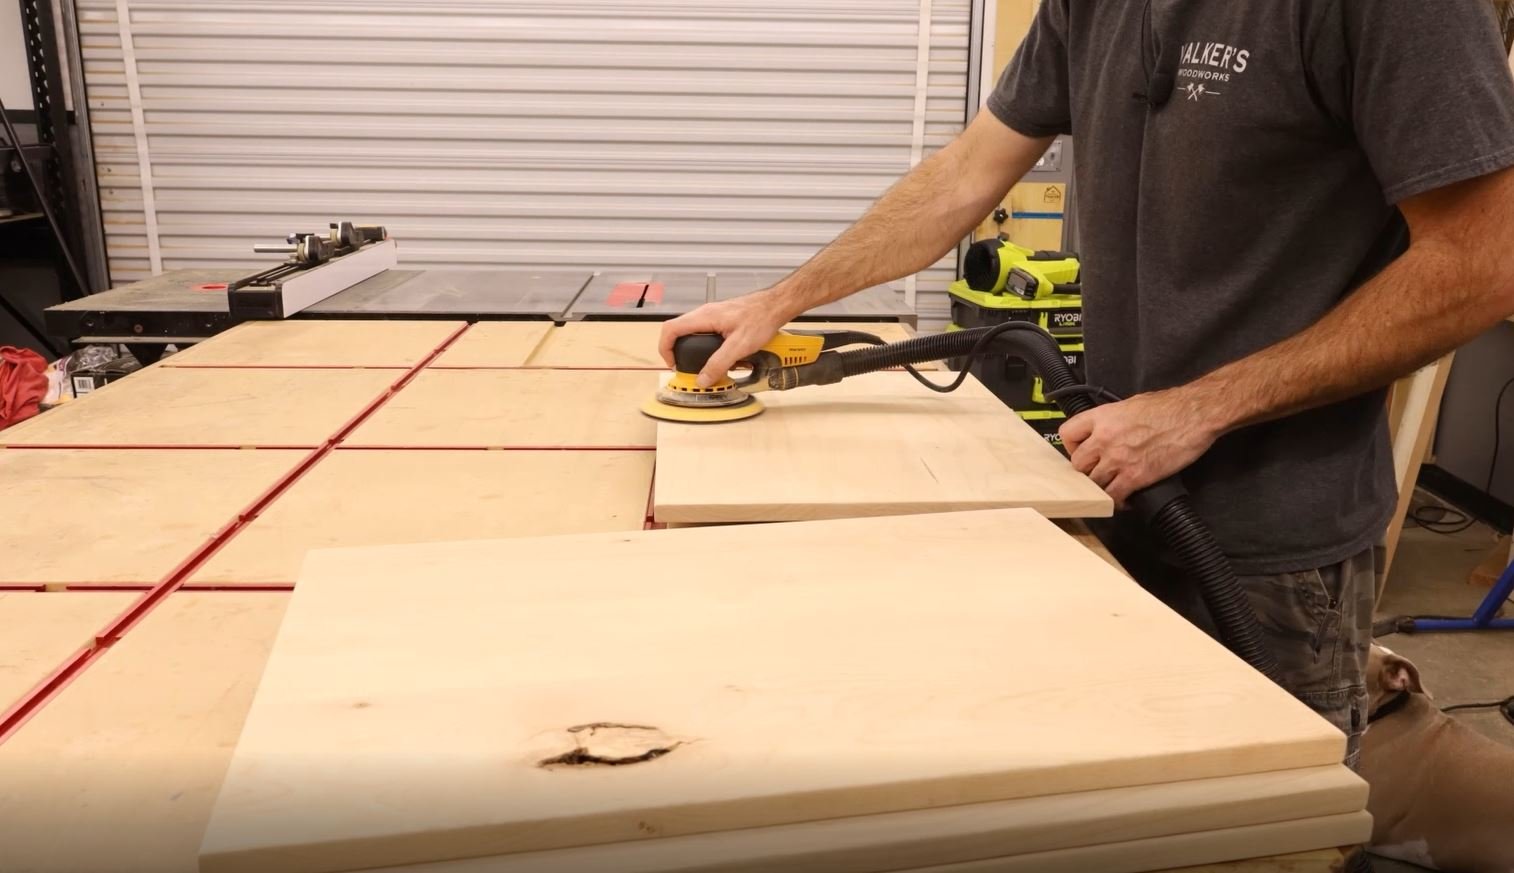
Then it was time to make the shelving. I did this by using glued together 1x6’s.


I took the top down to my friend that owns a cabinet shop and we ran it and the shelves though his big belt sander. Made quick work of it! I highly recommend reaching out to cabinet shops in your area and see if they offer this as a service. It saves so much work and time.


Back at the shop I final sanded and finished the shelves. I used a oil/wax blend finish on them.
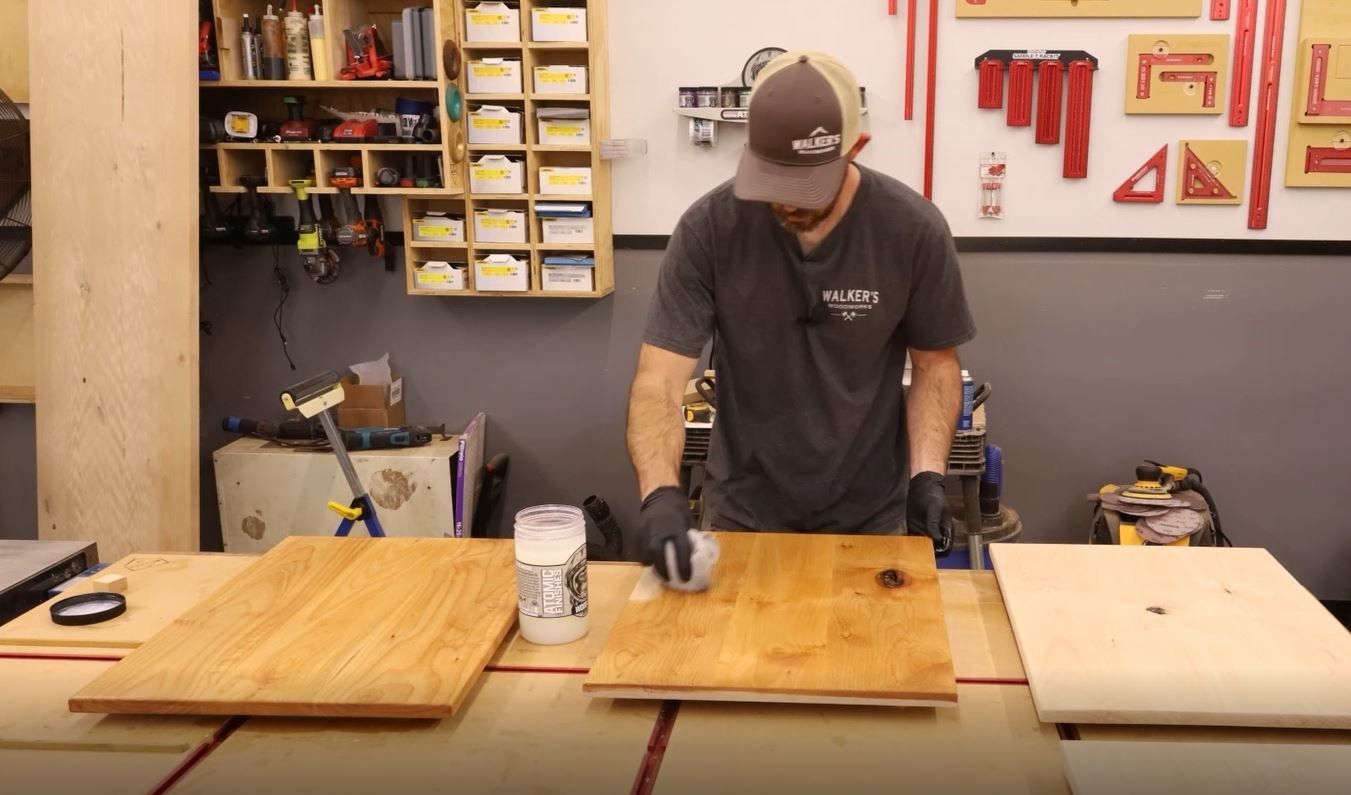
I wanted some contrast on this piece so I decided to finish the bases in black. Also a oil/wax blend finish.

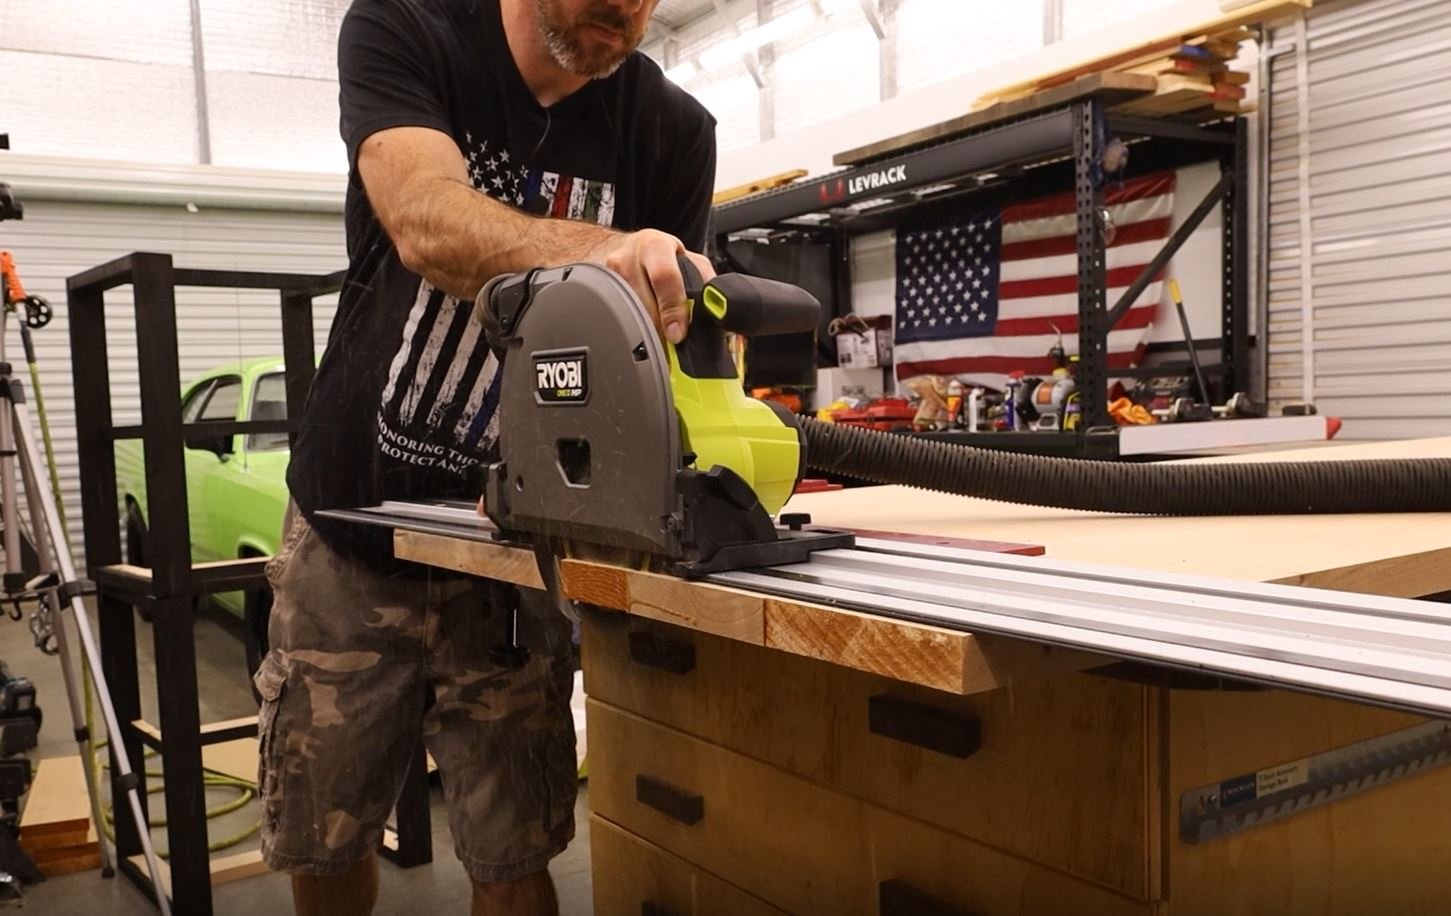
Then it was time to put the ONE+ HP 18V Brushless Cordless 6-1/2 in. Track Saw to work! I used it to flush trim the ends of the top and it worked great! I also used it to cut the angles on the back side so the desk would sit in the unique space its going in.

Once it was cut to final size I final sanded and finished the top!


I used “z clips” or some call them table top fasteners to fasten the shelves to the bases. I also used this same method to attach the top to the bases once I got it moved into place. I use the biscuit jointer to cut slots for the fasteners to sit in.
I had to disassemble and get rid of the couch that was in the trailer then I was able to move the desk in and assemble it!!


I am happy to report that my Mom loved the desk and enjoys it daily while looking out the window and working on her computer. I hope you guys enjoyed this build. Another special thanks to Home Depot for sponsoring this project! Until next time, get out and the shop and build something cool! Thanks for reading and see you on the next build.